


Appearance Golden Teacher Magic Mushroom:
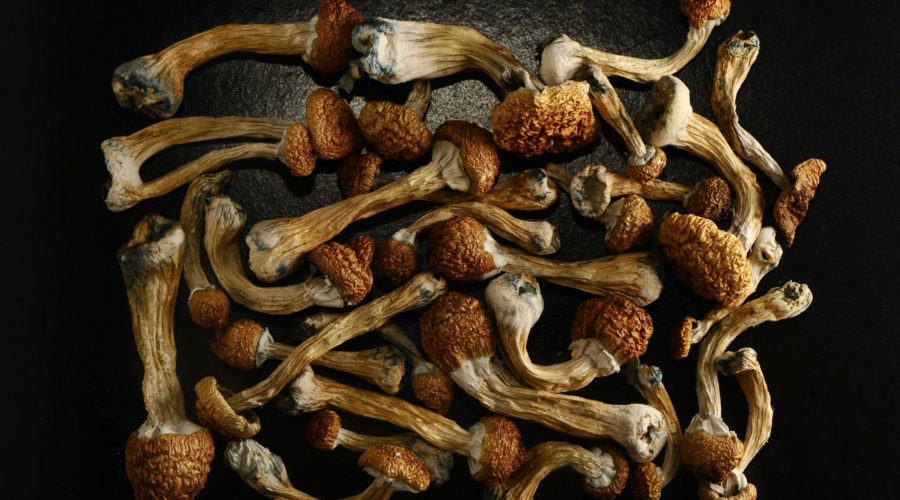
Golden Teacher Magic Mushroom are one of the most commonly used psilocybin mushrooms. They are not a species, but instead a strain of?Psilocybe cubensis?mushrooms.
As with other psilocybin mushrooms, the main psychoactive compounds it contains are psilocybin and psilocin. Cultivators and?psychonauts?like this magic mushroom strain for different reasons.
In this post, we will be exploring those reasons, as well as what makes Golden Teachers unique and different from other psilocybin mushrooms. Finally, we will end with a discussion on the legal status of Golden Teachers.
How To Grow Golden Teacher Magic Mushroom
INTRODUCTION
More and more people are growing?psilocybin mushrooms?at home. As well as providing a reliable, year-round supply, home cultivation eliminates the risk of misidentifying mushrooms in the wild. For many growers, it?s also a fun, low-cost hobby.
If you don?t know how to grow psilocybin mushrooms at home, you can start with a?mushroom grow kit.
If you?re interested in?legally consuming psilocybin, join our partner Synthesis for?legal retreats in Amsterdam?and visit our?Psychedelic Directory?for a complete list of?vetted psilocybin retreats worldwide.
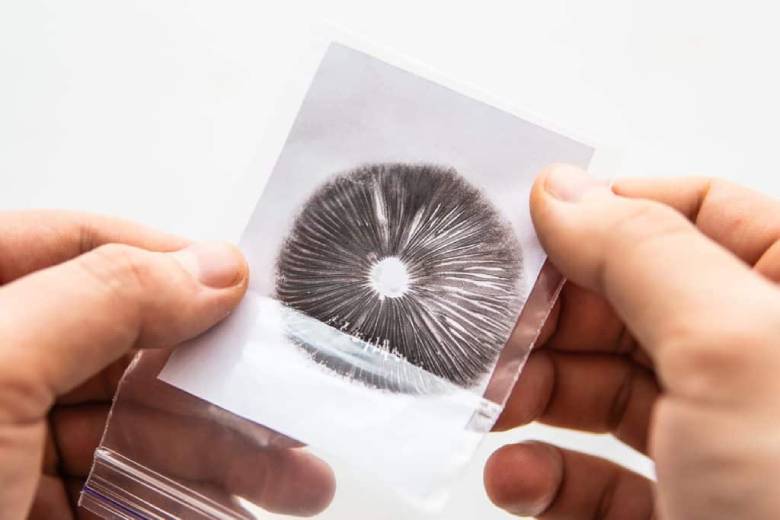
SPORE SYRINGES
The one thing you might have trouble getting is a good spore syringe. This will contain your magic mushroom spores and be used to ?sow? them into the substrate. Some growers have reported issues of contamination, misidentified strains, and even syringes containing nothing but water. However, as long as you do your research and find a reputable supplier, you shouldn?t have any problems.
In any case, after you?ve grown your first batch (or flush) of mushrooms, you can start filling syringes of your own.
WHAT VARIETY SHOULD I CHOOSE?
As you learn how to grow Golden Teacher Magic Mushroom, you?ll want to decide on a species and strain. Most suppliers offer a range to choose from, but the Psilocybe cubensis?B+ and Golden Teacher mushrooms are among the most popular for beginners. While not as potent as some others, like Penis Envy, they?re reportedly more forgiving of sub-optimal and changeable conditions.
Third Wave?s?How to Grow Mushrooms Course and Grow Kit?turn the daunting task of cultivating mushrooms into a simple one.
Our in depth guide and step-by-step videos will have you harvesting your own home-grown mushrooms in no time.
WHAT YOU WILL NEED
02
You?ll need a few materials to get started but don?t worry, this set up only needs to be purchased one-time, and is significantly more economical in the long run than purchasing a?mushroom grow kit?or buying by the gram.
INGREDIENTS
- Spore syringe, 10-12 cc
- Organic brown rice flour
- Vermiculite, medium/fine
- Drinking water
EQUIPMENT
- 12 Shoulderless half-pint jars with lids (e.g. Ball or Kerr jelly or canning jars)
- Hammer and small nail
- Measuring cup
- Mixing bowl
- Strainer
- Heavy-duty tin foil
- Large cooking pot with a tight lid, for steaming
- Small towel (or approx. 10 paper towels)
- Micropore tape
- Clear plastic storage box, 50-115L
- Drill with ?-inch drill bit
- Perlite
- Mist spray bottle
HYGIENE SUPPLIES
- Rubbing alcohol
- Butane/propane torch lighter
- Surface disinfectant
- Air sanitizer
- Sterilized latex gloves (optional)
- Surgical mask (optional)
- Still air or glove box (optional)
INSTRUCTIONS
03
This method of mushroom cultivation is cheap and pretty straightforward, therefore, perfect for the newbie fungi farmer and experienced ?fungiculturist? alike.? You prepare your substrate of brown rice flour, vermiculite, and water, and divide it between sterile glass jars. Introduce spores and wait for the mycelium to develop. This is the network of filaments that will underpin your mushroom growth. After 4-5 weeks, transfer your colonized substrates, or ?cakes?, to a fruiting chamber and wait for your mushrooms to grow.
NOTE:?Always ensure good hygiene before starting: spray an air sanitizer, thoroughly disinfect your equipment and surfaces, take a shower, brush your teeth, wear clean clothes, etc. You don?t need a lot of space, but your environment should be as sterile as possible. Opportunistic bacteria and molds can proliferate in conditions for cultivating shrooms, so it?s crucial to minimize the risk.
DIY home growing isn?t for everyone. If you?d like to explore functional or psychedelic mushrooms without cultivating them yourself, check out?Third Wave?s Ultimate Guide to Sourcing Psychedelic Medicines.
Want to easily grow mushrooms at home?
Third Wave?s?How to Grow Mushrooms Course and Grow Kit?turn the daunting task of cultivating mushrooms into a simple one.
Our in depth guide and step-by-step videos will have you harvesting your own home-grown mushrooms in no time.
STEP 1: PREPARATION
1) Prepare jars:
- With the hammer and nail (which should be wiped with alcohol to disinfect) punch four holes down through each of the lids, evenly spaced around their circumferences.
2) Prepare substrate:
- For each jar, thoroughly combine ? cup vermiculite and ? cup water in the mixing bowl. Drain excess water using the disinfected strainer.
- Add ? cup brown rice flour?per half-pint jar?to the bowl and combine with the moist vermiculite.
3) Fill jars:
- Being careful not to pack too tightly, fill the jars to within a half-inch of the rims.
- Sterilize this top half-inch with rubbing alcohol
- Top off your jars with a layer of dry vermiculite to insulate the substrate from contaminants.
4) Steam sterilize:
- Tightly screw on the lids and cover the jars with tin foil. Secure the edges of the foil around the sides of the jars to prevent water and condensation from getting through the holes.
- Place the small towel (or paper towels) into the large cooking pot and arrange the jars on top, ensuring they don?t touch the base.
- Add tap water to a level halfway up the sides of the jars and bring to a slow boil, ensuring the jars remain upright.
- Place the tight-fitting lid on the pot and leave to steam for 75-90 minutes. If the pot runs dry, replenish with hot tap water.
NOTE:?Some growers prefer to use a pressure cooker set for 60 minutes at 15 PSI.
5) Allow to cool:
- After steaming, leave the foil-covered jars in the pot for several hours or overnight. They need to be at room temperature before the next step.
STEP 2: INOCULATION
1) Sanitize and prepare syringe:
- Use a lighter to heat the length of your syringe?s needle until it glows red hot. Allow it to cool and wipe it with alcohol, taking care not to touch it with your hands.
- Pull back the plunger a little and shake the syringe to evenly distribute the magic mushroom spores.
NOTE:?If your spore syringe and needle require assembly before use, be extremely careful to avoid contamination in the process. Sterilized latex gloves and a surgical mask can help, but the surest way is to assemble the syringe inside a disinfected still air or glove box.
2) Inject spores:
- Remove the foil from the first of your jars and insert the syringe as far as it will go through one of the holes.
- With the needle touching the side of the jar, inject approximately ? cc of the spore solution (or slightly less if using a 10 cc syringe across 12 jars).
- Repeat for the other three holes, wiping the needle with alcohol between each.
- Cover the holes with micropore tape and set the jar aside, leaving the foil off.
- Repeat the inoculation process for the remaining jars, sterilizing your needle with the lighter, and then alcohol between each.
STEP 3: COLONIZATION
1) Wait for the mycelium:
- Place your inoculated jars somewhere clean and out of the way. Avoid direct sunlight and temperatures outside 70-80 ?F (room temperature).
- White, fluffy-looking mycelium should start to appear between seven and 14 days, spreading outward from the inoculation sites.
NOTE:?Watch out for any signs of contamination, including strange colors and smells, and dispose of any suspect jars immediately. Do this outside in a secure bag without unscrewing the lids. If you?re unsure about whether a jar is contaminated, always err on the side of caution?even if the substrate is otherwise healthily colonized?as some contaminants are deadly for humans.
2) Consolidate:
- After three to four weeks, if all goes well, you should have at least six successfully colonized jars. Leave for another seven days to allow the mycelium to strengthen its hold on the substrate.
STEP 4: PREPARING THE GROW CHAMBER
1) Make a shotgun fruiting chamber:
- Take your plastic storage container and drill ?-inch holes roughly two inches apart all over the sides, base, and lid. To avoid cracking, drill your holes from the inside out into a block of wood.
- Set the box over four stable objects, arranged at the corners to allow air to flow underneath. You may also want to cover the surface under the box to protect it from moisture leakage.
NOTE:?The shotgun fruiting chamber is far from the best design, but it?s quick and easy to build and does the job well for beginners. Later, you may want to try out alternatives.
2) Add perlite:
- Place your perlite into a strainer and run it under the cold tap to soak.
- Allow it to drain until there are no drips left, then spread it over the base of your grow chamber.
- Repeat for a layer of perlite roughly 4-5 inches deep.
STEP 5: FRUITING
1) ?Birth? the colonized substrates (or ?cakes?):
- Open your jars and remove the dry vermiculite layer from each, taking care not to damage your substrates, or ?cakes?, in the process.
- Upend each jar and tap down onto a disinfected surface to release the cakes intact.
2) Dunk the cakes:
- Rinse the cakes one at a time under a cold tap to remove any loose vermiculite, again taking care not to damage them.
- Fill your cooking pot, or another large container, with tepid water, and place your cakes inside. Submerge them just beneath the surface with another pot or similar heavy item.
- Leave the pot at room temperature for up to 24 hours for the cakes to rehydrate.
3) Roll the cakes:
- Remove the cakes from the water and place them on a disinfected surface.
- Fill your mixing bowl with dry vermiculite.
- Roll your cakes one by one to fully coat them in vermiculite. This will help to keep in the moisture.
4) Transfer to grow chamber:
- Cut a tin foil square for each of your cakes, large enough for them to sit on without touching the perlite.
- Space these evenly inside the grow chamber.
- Place your cakes on top and gently mist the chamber with the spray bottle.
- Fan with the lid before closing.
5) Optimize and monitor conditions:
- Mist the chamber around four times a day to keep the humidity up, taking care not to soak your cakes with water.
- Fan with the lid up to six times a day, especially after misting, to increase airflow.
NOTE:?Some growers use fluorescent lighting set on a 12-hour cycle, but indirect or ambient lighting during the day is fine. Mycelium only needs a little light to determine where the open air is and where to put forth mushrooms.
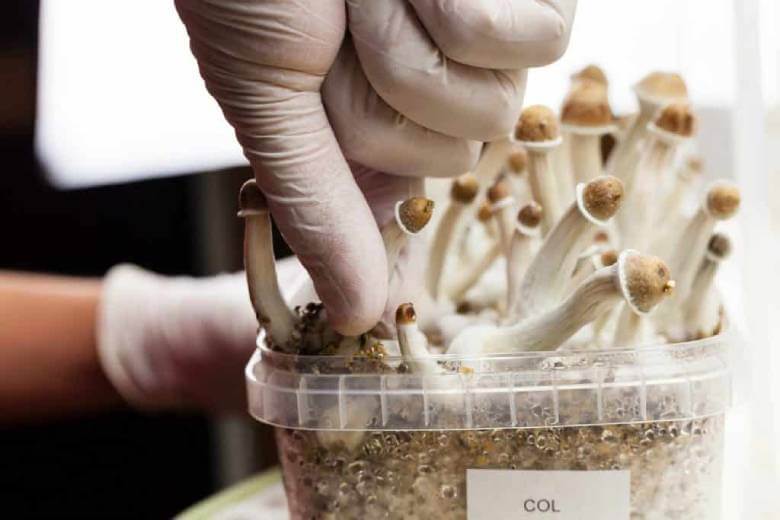
STEP 6: HARVESTING
1) Watch for fruits:
- Your mushrooms, or fruits, will appear as tiny white bumps before sprouting into ?pins.? After 5-12 days, they?ll be ready to harvest.
2) Pick your fruits:
- When ready, cut your mushrooms close to the cake to remove. Don?t wait for them to reach the end of their growth, as they?ll begin to lose potency as they mature.
Dosage Guide
* Micro: 0.25 gram
* Low: 0.25 ? 1 gram
* Medium: 1 ? 2 gram
* Strong: 2.5 ? 5 gram
* Heavy: 5 gram and upwards
Golden Teacher Effects
Golden Teacher offers a shorter experience than many other magic mushrooms, lasting only between one and two hours. However, Golden Teacher provides an experience of average potency, making it perfect for first-time users or more reserved magic mushroom enthusiasts. The shorter trip is advantageous for people who are new to magic mushrooms because they don?t have to have an extended experience without even knowing if they will like it.
In addition, Golden Teachers gives you an experience that is very calm and relaxing with mild visuals at best. These mushrooms are suitable for every person who wants to try magic mushrooms, from beginners to experienced users. They are also not as likely to give users a bad trip. Since these mushrooms fall on the lighter side of potency, they are ideal for people who fear the psychedelic effects of magic mushrooms.
Golden Teachers for Spiritual Use
These mushrooms got their name because of their one-of-a-kind ability to offer users an experience that is transcendent and enlightening. When people use Golden Teachers, they often learn new things about themselves. They also discover something about the world that surrounds them.
This can lead to them finding answers to fundamental questions that they have had on their minds. Therefore these mushrooms have been linked to spiritual practices for many years. People often feel a sense of enlightenment if they take Golden Teacher while being in a good and uplifting mood.
A great advantage of Golden Teachers is that they most commonly offer an excellent trip. Unfortunately, this isn?t the case with all magic mushrooms, and some kinds often leave users experiencing a bad trip. Although people who take Golden Teachers still get that psychedelic high, the Golden Teacher?s strain composition and milder potency reduce the odds of experiencing a bad trip.
However, a bad trip can?t be completely ruled out. The most significant contributing factor to the high you will experience with Golden Teacher is your mood when you take the magic mushrooms. Therefore, it is recommended for people who are trying magic mushrooms for the first time to wait until they are happy and uplifted before ingesting the mushrooms.
This can significantly help prevent an undesired lousy trip. The reason for this is that Golden Teacher acts as a mood enhancer. If you take Golden Teacher while feeling down or blue, those negative emotions can be intensified. This, of course, is not the effect people desire when they take Golden Teacher. Therefore it is best to keep them in a safe place until you feel happy and ready for the trip of your life.
How Long Do Mushrooms Stay in Your System?
Common hallucinogens, with the possible exception of?phencyclidine (PCP), are not usually tested for on standard workplace drug screens. However, if desired by legal authorities, medical personnel, or an employer, it is possible to perform laboratory assays that can detect any drug or metabolite, including psilocybin, via advanced techniques.
When tested via urine, the psilocybin mushroom metabolite psilocin can stay in your system for up to 3 days. However,?metabolic rate, age, weight, age, medical conditions, drug tolerance, other drugs or medications used, and urine pH of each individual may affect actual detection periods.
Extent of Hallucinogenic Mushroom Use
Based on a 2018 survey from?SAMHSA?s National Survey on Drug Use and Health?(NSDUH), about 5.6 million people aged 12 or older reported using hallucinogens (which may include psilocybin mushrooms) in the year prior to the survey. In 2017, that number was roughly 5.1 million. In the survey, hallucinogens include not only psilocybin from mushrooms, but also other psychedelic drugs like LSD, MDMA (Ecstasy, Molly), and peyote (mescaline). In comparison, 43.5 million people used marijuana in the year prior to the 2018 survey.
In 2018, there were 1.1 million people aged 12 and older who had used hallucinogens?for the first time?within the past year. In particular, college students, and people ages 18 to 25, may choose mushrooms as a drug of abuse.
Legality Of :
Psilocybin is a Schedule I substance under the federal DEA’s Controlled Substances Act, which is defined as a substance with a high potential for abuse, no currently accepted medical use in treatment in the U.S., and a lack of accepted safety for use under medical supervision.
However, in November 2020, the state of Oregon passed Measure 109 to legalize psilocybin for people age 21 and older. In another vote, psilocybin was decriminalized. Proponents of psilocybin legalization in Oregon promote its use for medical conditions, such as depression, anxiety, or PTSD. The new law will make psilocybin more accessible to people who need them clinically. Measure 109 will be enacted after a developmental stage is completed, expected to be a two year process. Washington, DC also decriminalized psilocybin in Nov. 2020.
Psilocybin is not available to doctors in the clinical setting because it is listed as a?Schedule I drug?by the US Drug Enforcement Agency (DEA). Researchers may only be able to get access to the illegal compound for the study through special waivers from the U.S. Food and Drug Administration (FDA). Other drugs found in federal Schedule I include?marijuana,?LSD, and?heroin. In order for psilocybin to be prescribed for patients, it would have to be reclassified as a?Schedule II medication, meaning it has a currently accepted medical use, but with severe restrictions due to addiction potential. Whether legalization will make it easier for researchers to study psilocybin remains to be seen.
Reviews
There are no reviews yet.